Your own hosting like a boss (5 of 5)
The idea:
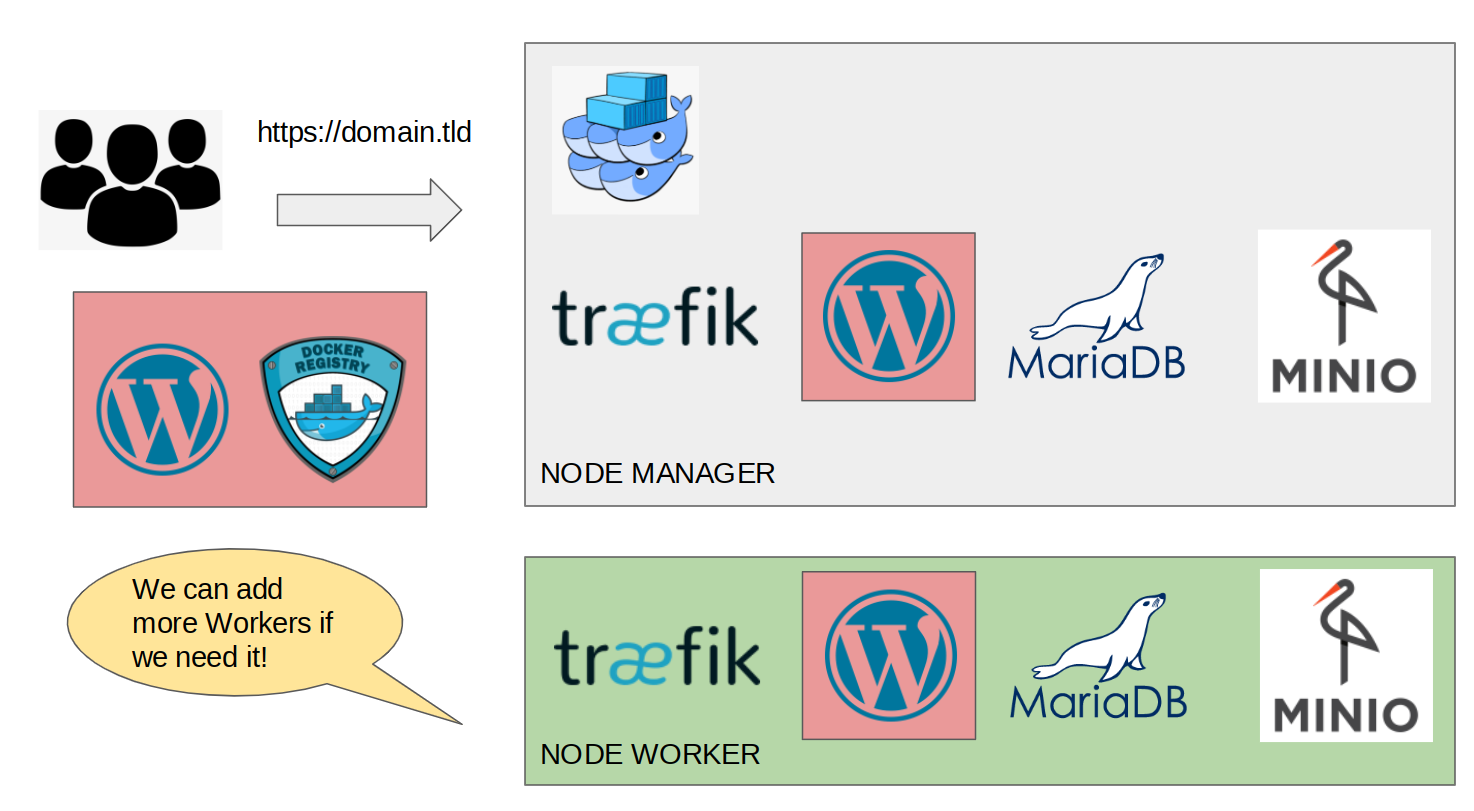
Understanding the graph:
-
Why should we use Minio? In this sample I’m using Minio, but if you prefer you could use a similar alternative for Object Storage, the most knowed is Amazon S3, but Digital Ocean has one too. If your team uses Git (a usual situation at 2022) you probably know that WP save images into a directory called wp-content, this could be a mess if you add these images to the repository. Another good thing is you are going to have a nice distributed system, your own cdn, and finally you will have the possibility to replicate the WP containers.
-
With this arquitecture we have a base with 4 containers: Wordpress, Maria DB, Minio and Traefik, and we can add more replicas, and much better we can add as workers as we need them.
Let’s do a quick test with only a simple Docker Compose file.
mkdir wp
cd wp
mkdir mariadb_data && chown 1001 mariadb_data
mkdir minio_data && chown 1001 minio_data
mkdir wordpress_data && chown 1001 wordpress_data
docker-compose up
Here the docker compose file:
version: '2'
services:
  mariadb:
    image: docker.io/bitnami/mariadb:10.6
    volumes:
      - './mariadb_data:/bitnami/mariadb'
    environment:
      # ALLOW_EMPTY_PASSWORD is recommended only for development.
      - ALLOW_EMPTY_PASSWORD=yes
      - MARIADB_USER=bn_wordpress
      - MARIADB_DATABASE=bitnami_wordpress
  wordpress:
    image: docker.io/bitnami/wordpress:5
    ports:
      - '8080:8080'
      - '8443:8443'
    volumes:
      - './wordpress_data:/bitnami/wordpress'
    depends_on:
      - mariadb
    environment:
      # ALLOW_EMPTY_PASSWORD is recommended only for development.
      - ALLOW_EMPTY_PASSWORD=yes
      - WORDPRESS_DATABASE_HOST=mariadb
      - WORDPRESS_DATABASE_PORT_NUMBER=3306
      - WORDPRESS_DATABASE_USER=bn_wordpress
      - WORDPRESS_DATABASE_NAME=bitnami_wordpress
  minio:
    image: docker.io/bitnami/minio:2022
    ports:
      - '9000:9000'
      - '9001:9001'
    environment:
      - MINIO_ROOT_USER=minioadmin
      - MINIO_ROOT_PASSWORD=minioadmin
    volumes:
      - './minio_data:/data'
You can download the file here.
If everything wen fine you now should go to WP Login Page http://localhost:8080/wp-login.php.
user: user
pass: bitnami
How can I access to Minio? From this url: http://localhost:9001/login. You should see the credentials into the docker-compose file 😀.
Create a new user with read and write permissions:
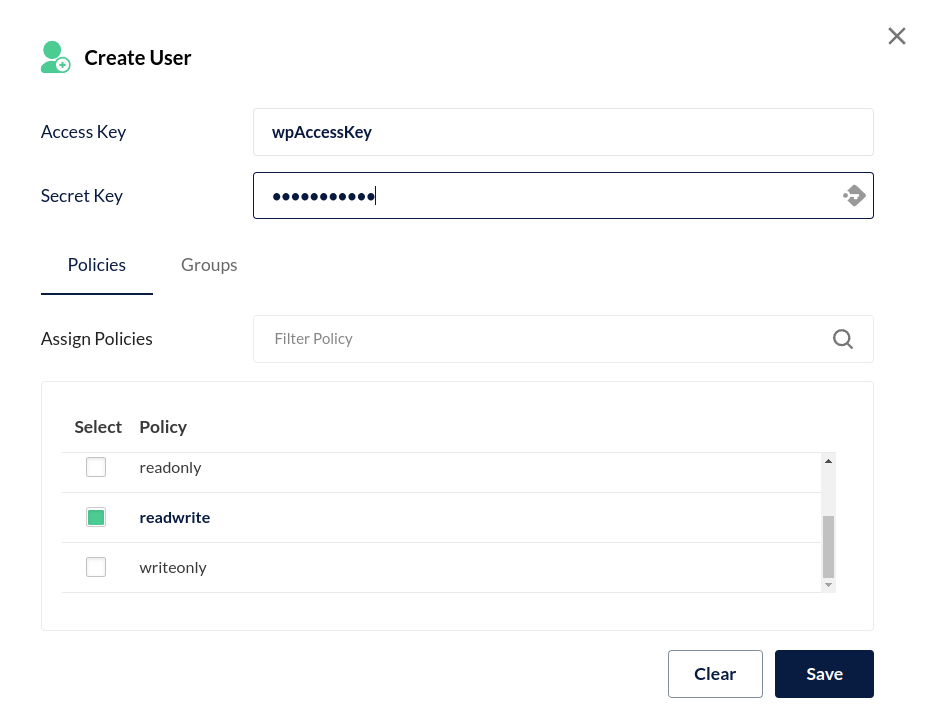
Create a new bucket with (Important!) “Public Access”.
And now we are going to install a useful plugin.
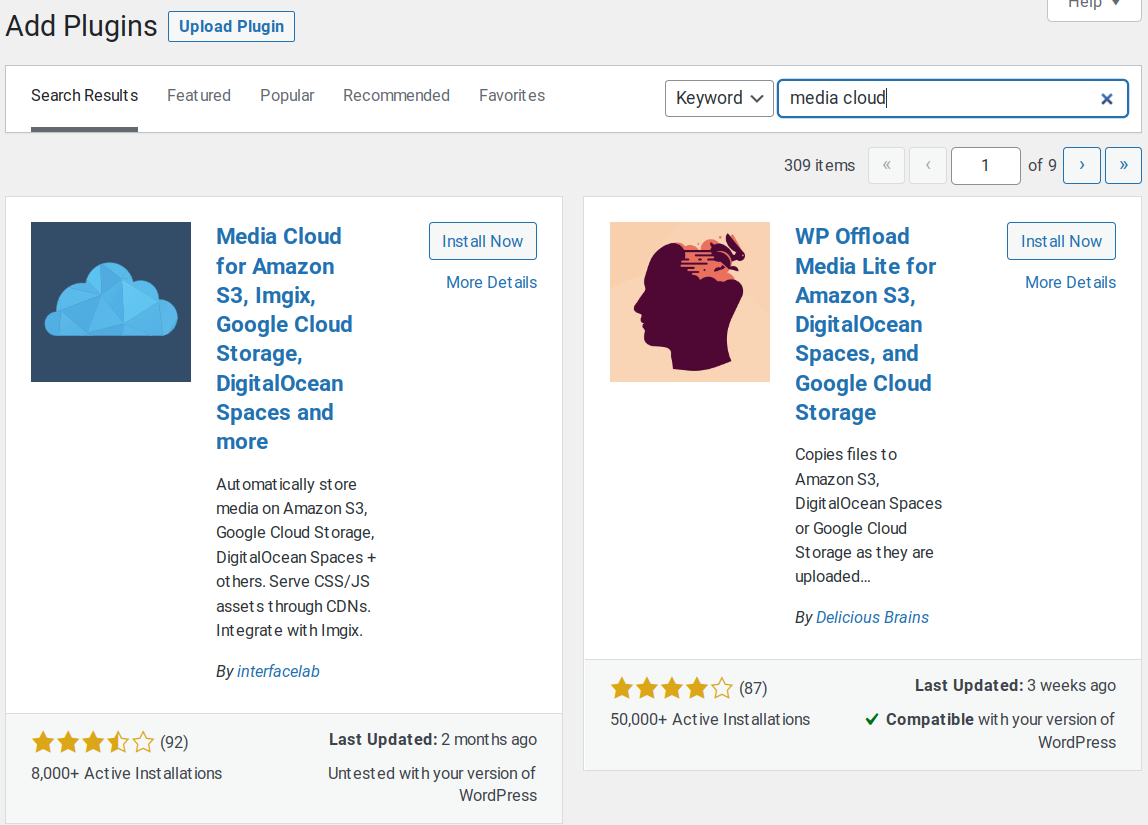
Awesome, you will see a “wizard setup” with the Minio option. Fill the fields:
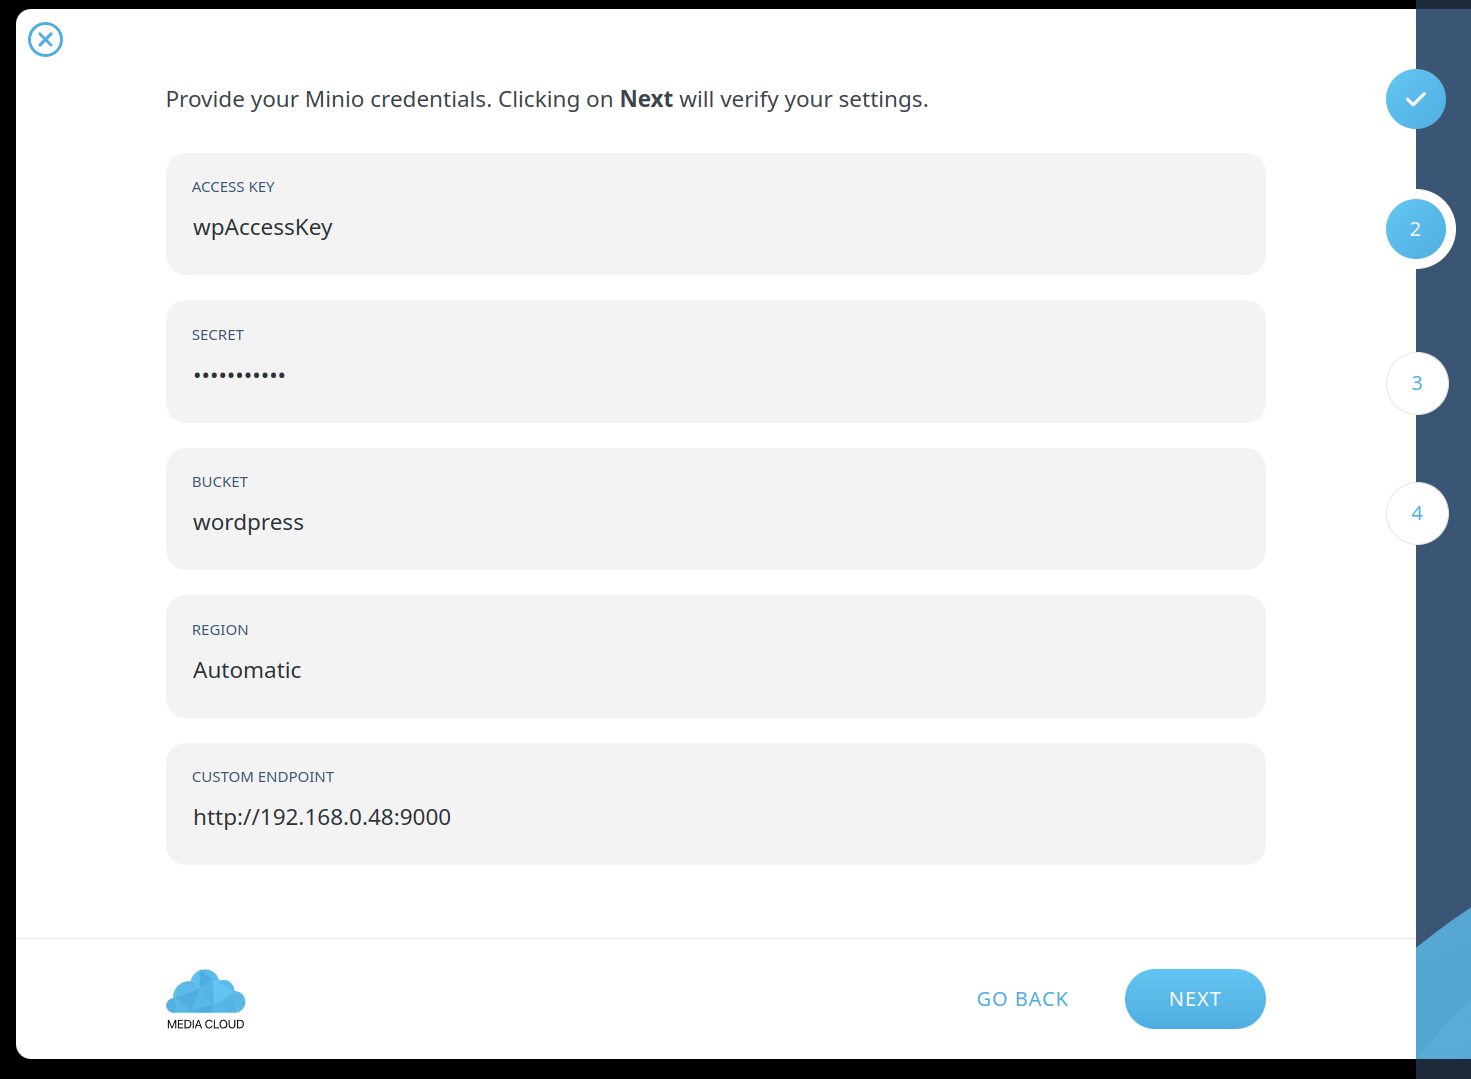
NOTE: as you noticed, the URL in this case is in a local network (http://192.168.0.48:9000). Remember: wordpress should access to this url to upload and show objects.
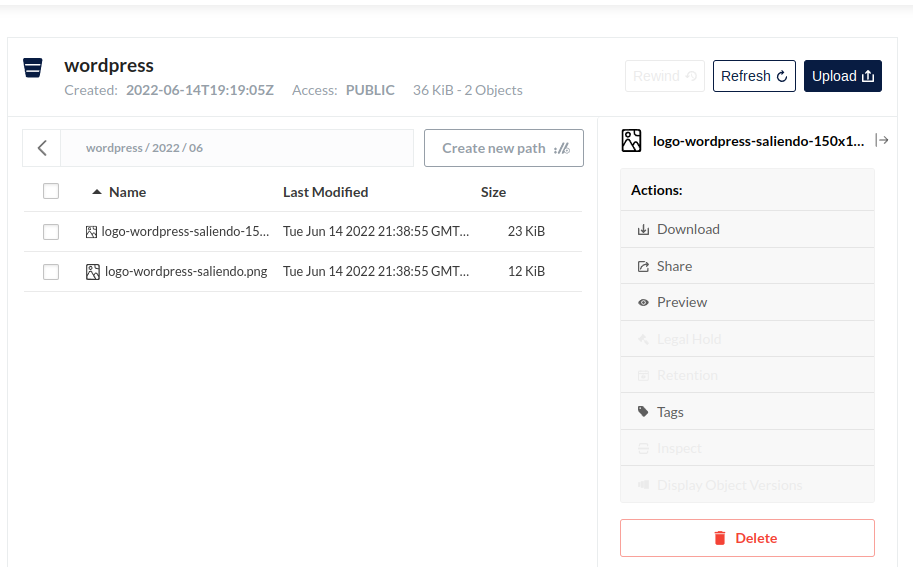
Add a image to the “Media” section. If you take a look into the Minio Admin Tool, you will see the images uploaded.
Let’s do a quick test now. We have 2 machines with docker installed. You are going to choose one of them to work as a master.
This is a simple yaml with the configuation with Traefik and Portainer. For simplify we are not going to use SSL, but it should be very easy to add a web secure access.
version: "3.3"

services:
  traefik:
    image: "traefik:latest"
    command:
      - --api.dashboard=true
      - --api.insecure=true
      - --entrypoints.web.address=:80
      - --providers.docker
    ports:
      - "80:80"
    volumes:
      - "/var/run/docker.sock:/var/run/docker.sock:ro"
    labels:
      - "traefik.enable=true"
      # Dashboard
      # Take care of the domain
      - "traefik.http.routers.traefik-public.rule=Host(`traefik.local`)"
      - "traefik.http.routers.traefik-public.entrypoints=web"
      - "traefik.http.services.traefik-public.loadbalancer.server.port=8080"
      - "traefik.http.routers.traefik-public.service=api@internal"

  portainer:
    image: portainer/portainer-ce:latest
    command: -H unix:///var/run/docker.sock
    volumes:
      - /var/run/docker.sock:/var/run/docker.sock
      - portainer_data:/data
    deploy:
      mode: replicated
      replicas: 1
      placement:
        constraints: [node.role == manager]
    labels:
      - "traefik.enable=true"
      # Frontend
      # Take care of the domain
      - "traefik.http.routers.frontend.rule=Host(`portainer.local`)"
      - "traefik.http.routers.frontend.entrypoints=web"
      - "traefik.http.services.frontend.loadbalancer.server.port=9000"
      - "traefik.http.routers.frontend.service=frontend"

volumes:
  portainer_data:
You can download the file here.
If you are working in a local networks it’s a good idea to create “fake domains” into your “/etc/hosts”. Sample with the server IP:
192.168.0.94    traefik.local
192.168.0.94    portainer.local
192.168.0.94    wordpress.local
192.168.0.94    minio.local
192.168.0.94    minio.admin.local
Run this commands into the server 192.168.0.94.
docker network create wordpress_network --scope swarm
docker swarm init
docker stack deploy -c portainer.yaml portainer
If every thing it’s ok you can go to Portainer from http://portainer.local and add this minimal stack of wordpress:
version: '3'

volumes:
  db_data:
  wordpress_data:
  minio_data:

networks:
  wordpress_network:
  portainer_default:
    external: true

services:
  mariadb:
    image: docker.io/bitnami/mariadb:10.6
    networks:
      - wordpress_network
    volumes:
      - 'db_data:/bitnami/mariadb'
    environment:
      # ALLOW_EMPTY_PASSWORD is recommended only for development.
      - ALLOW_EMPTY_PASSWORD=yes
      - MARIADB_USER=bn_wordpress
      - MARIADB_DATABASE=bitnami_wordpress
  wordpress:
    image: docker.io/bitnami/wordpress:6
    networks:
      - wordpress_network
      - portainer_default
    volumes:
      - 'wordpress_data:/bitnami/wordpress'
    depends_on:
      - mariadb
    environment:
      # ALLOW_EMPTY_PASSWORD is recommended only for development.
      - ALLOW_EMPTY_PASSWORD=yes
      - WORDPRESS_DATABASE_HOST=mariadb
      - WORDPRESS_DATABASE_PORT_NUMBER=3306
      - WORDPRESS_DATABASE_USER=bn_wordpress
      - WORDPRESS_DATABASE_NAME=bitnami_wordpress
    labels:
      - "traefik.enable=true"
      # Frontend
      # Take care of the domain
      - "traefik.docker.network=portainer_default"
      - "traefik.http.routers.wordpress.rule=Host(`wordpress.local`)"
      - "traefik.http.routers.wordpress.entrypoints=web"
      - "traefik.http.services.wordpress.loadbalancer.server.port=8080"
      - "traefik.http.routers.wordpress.service=wordpress"
  minio:
    image: docker.io/bitnami/minio:2022
    networks:
      - wordpress_network
      - portainer_default
    environment:
      - MINIO_ROOT_USER=minioadmin
      - MINIO_ROOT_PASSWORD=minioadmin
    volumes:
      - 'minio_data:/data'
    labels:
      - "traefik.enable=true"
      # Frontend
      # Take care of the domain
      - "traefik.docker.network=portainer_default"
      - "traefik.http.routers.minio.rule=Host(`minio.local`)"
      - "traefik.http.routers.minio.entrypoints=web"
      - "traefik.http.services.minio.loadbalancer.server.port=9000"
      - "traefik.http.routers.minio.service=minio"
      # minio-admin
      - "traefik.http.routers.minio-admin.rule=Host(`minio.admin.local`)"
      - "traefik.http.routers.minio-admin.entrypoints=web"
      - "traefik.http.services.minio-admin.loadbalancer.server.port=9001"
      - "traefik.http.routers.minio-admin.service=minio"
You can download the file here.
If everything is ok you can go to Minio (http://minio.admin.local) and crete the bucket and the user. And then go to WP and configure the Media Cloud Plugin.
Let’s add 2 replicas to Wordpress container:
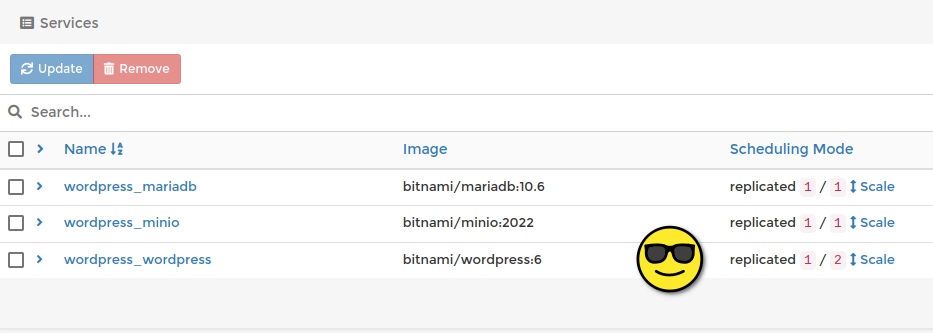
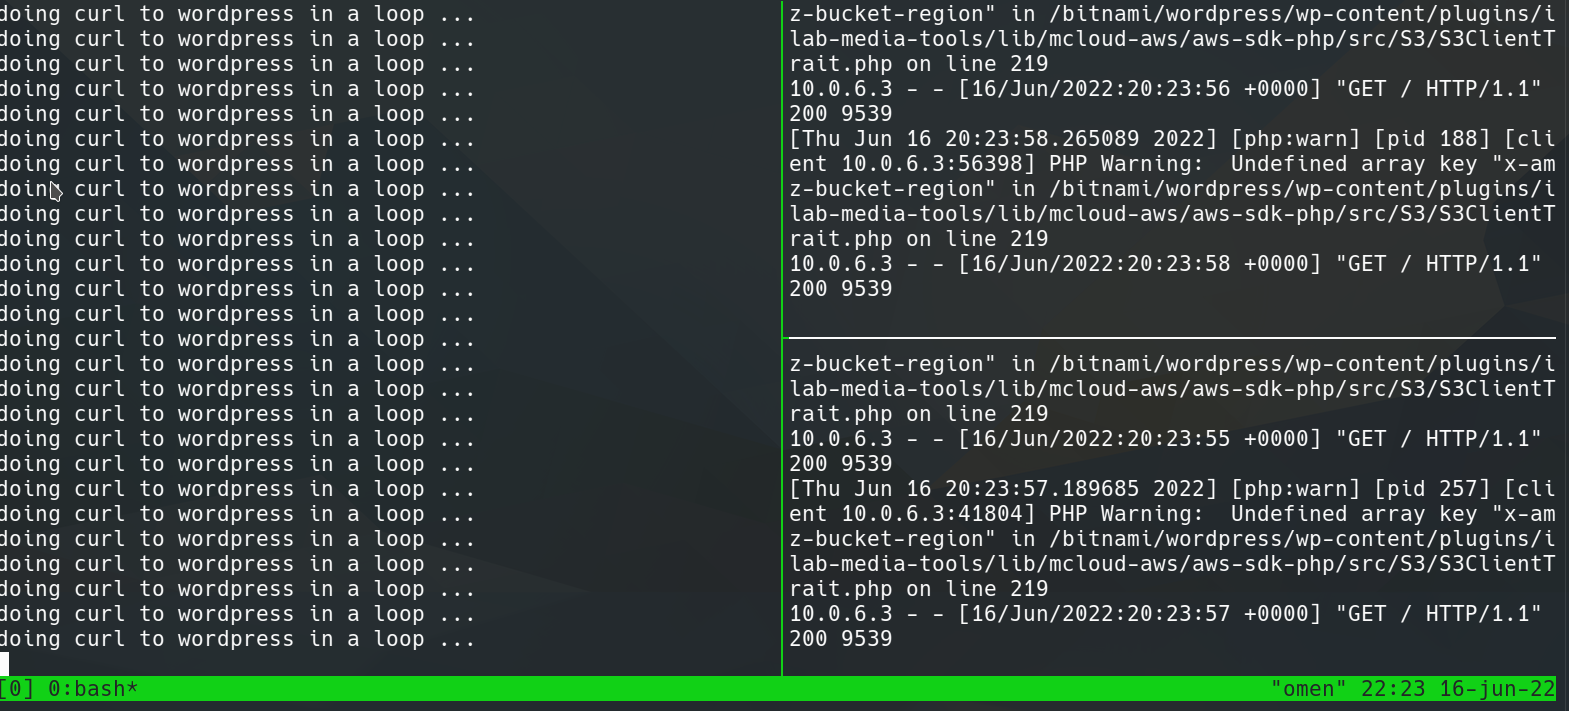
And now go to the master server and log the 2 containers which are running wordpress.
docker logs -f 7da055fb1de5
...
The replicas are working and the traffic is balanced!!!
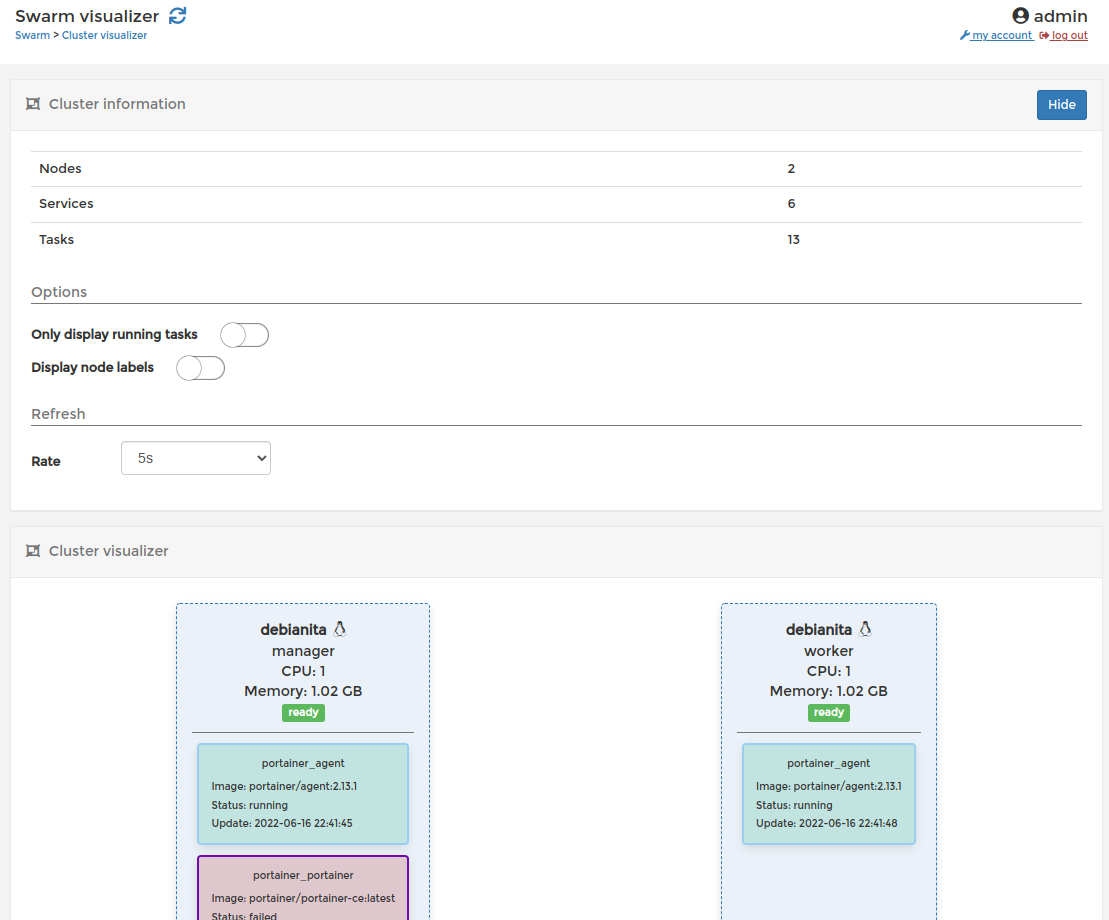
To see all nodes you are going to add to the cluster, in portainer you should install the “Portainer Agent”, write these commands:
docker network create \
  --driver overlay \
  portainer_agent_network

docker service create \
  --name portainer_agent \
  --network portainer_agent_network \
  -p 9001:9001/tcp \
  --mode global \
  --constraint 'node.platform.os == linux' \
  --mount type=bind,src=//var/run/docker.sock,dst=/var/run/docker.sock \
  --mount type=bind,src=//var/lib/docker/volumes,dst=/var/lib/docker/volumes \
  portainer/agent:2.13.1
And now the last thing. We are going to run a new server with docker and connect to master. First we need to know the token from the manager:
moncho@debianita:~$ docker swarm join-token worker
To add a worker to this swarm, run the following command:

    docker swarm join --token [here_the_huge_token] 192.168.0.94:2377
Then we are going to run the command into the worker. If you see the message “This node joined a swarm as a worker.” then you are finished!. Now you can add how much workers as you want and then up the number of replicas, you can scale “to infinity and beyond!”.
NOTE: I know “Docker Swarm” is going to be discontinued. But, in this moment, is included in the latest versions of Docker. So, it’s a good tool to understand how it works a cluster and in a easy mode start to work with containers like a Pro. In the future I will focus in Kubernetes because now I don’t have production projects in Docker Swarm 😀. See you soom (I do hope) in the next post.
